Construction Details
Click on the Photo To Enlarge and See Description

1. A properly designed and well built system is key to good handling and reducing stress on your cattle. There are some building basics and details that animal behaviorists have identified as necessary for designs that minimize stress in cattle. Top on this list is a handling system that uses curves.
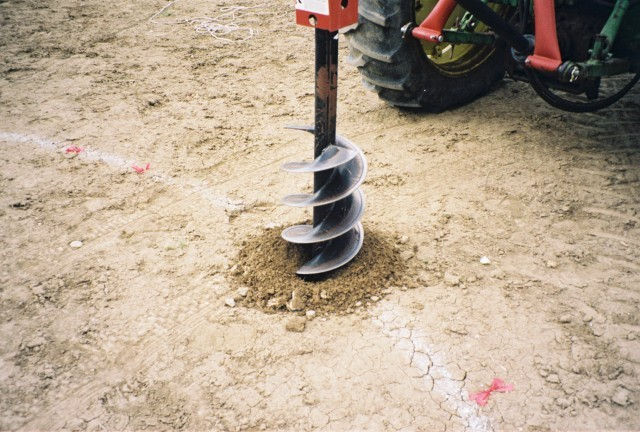
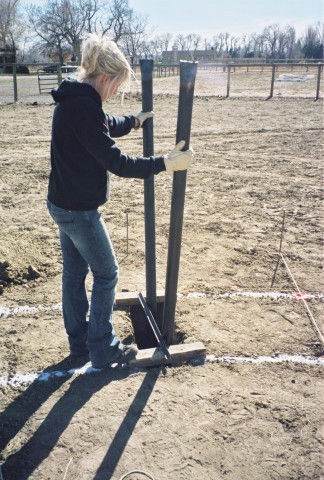
2. After you lay out your new facility on the ground, mark the position on the ground for each post and begin digging the holes. Center the posthole digger over the nail with the colored flagging attached to it. Dig the holes 30 inches (76cm) deep in 10-to12 inch (25 to 30cm) diameter holes and set the posts in concrete. Pour concrete in the hole then lift the post so there are 6 inches (15cm) of concrete below the bottom of the post.
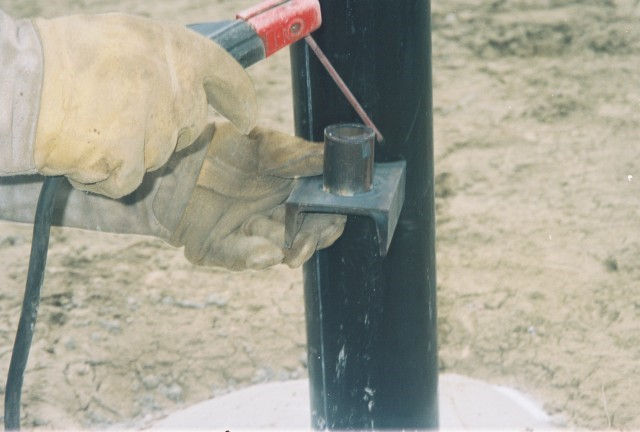
3. When building the channel iron hinge, cut a hole in the channel and weld the pipe sleeve to the bottom of the channel. The gate must not pivot against the welding bead. Weld the bottom 3-inch (8cm) wide channel gate to the gatepost. The pipe that forms the gate frame will fit over the 2-inch (5cm) pipe sleeve welded to the channel iron. The top hinge is made the same way as the bottom hinge except it is inverted, and the pipe sleeve is inserted into the top of the gate frame.

4. Build the gate and hang the gate. When laying out the posts for the round crowd pen, the crowd gate can be employed as a compass to accurately place your posts.

5. Prepare the posts for the round crowd pen. Crimping the top of a fence post allows the top rail to be welded on without having to make time-consuming curved saddle cuts. Heat the end of the post with a torch to soften it before using the hammer, or crimp with a hydraulic press. When using a hydraulic press go slowly to prevent splitting the end of the post.

6. The 12-foot (3.6m) crowd gate is used as a compass to determine the precise post locations of the half-circle crowd pen so that a 2-inch (5cm) gap is maintained between the end of the gate and the fence posts.

7. The hinges should be welded on the correct location so the crowd gate will swing completely open and lay flat back against the fence.

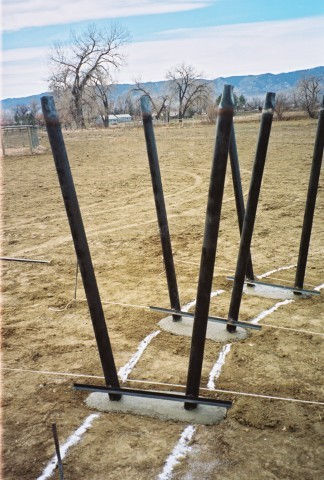
8. All posts in the half-circle crowd pen are placed on 4-foot (1.2m) centers.
9. Weld the top rail on the entire curved fence. Use lengths of 2-inch (5cm) pipe in 21 foot long sections. Heat the pipe with torch-heating tip pulled around to each post. You can also roll the pipe at a machine shop to fit the radius of the curved fence. Many large machine shops or welding shops have pipe rolling equipment.

10. Dig the holes for the V-shaped single file chute. An old ax head welded to the end of a digging bar works well for digging a rectangular hole that the V-section can be set into.

11. To maintain accurate dimensions on the V-shaped single file chute, use a jig made from a sheet of plywood with pieces of wood nailed in to hold the pipes in place. The welded jig bars maintain the V-shaped assembly in the correct dimensions.

12. A slot is cut into the edge of the plywood so that the crimped end of the post will stand upright and can be lined up with the direction of the fence.
13. Line up the V-jig with the string. Each of the jigs is placed on 4-foot (1.2m) centers along the outside radius of the line.

14. The V-jig bar can rest on wooden blocks or bricks to hold the V-section in the correct position when the hole is filled with concrete.
15. The V-sections have been set and they are lined up like bicycle spokes with strings tied to the center point of the 16-foot (4.8m) radius of the curved single-file chute. The top jig bars will be buried in the concrete floor and do not have to be removed.
16. Make sure the top jig bar is above ground level and the posts on the outside radius are on 4-foot (1.2m) centers.
17. From the ground level, the top of the V-shaped single file must be 5-foot 6-inches (1.5m 15 cm). This allows enough height so 6-inches (15cm) of concrete slab can be poured leaving a 5-foot (1.5m) overall height to the fence.

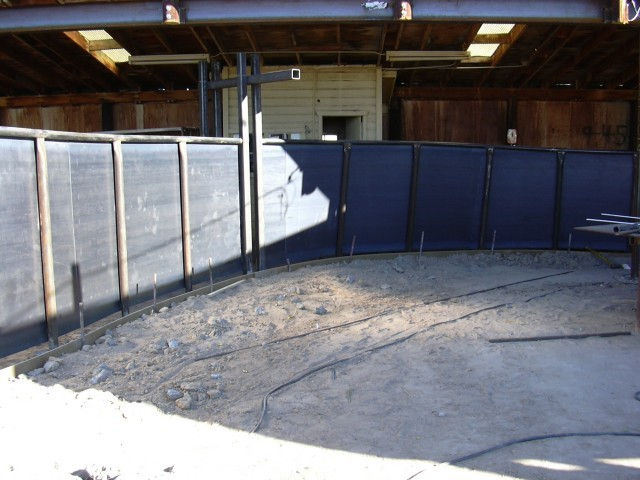
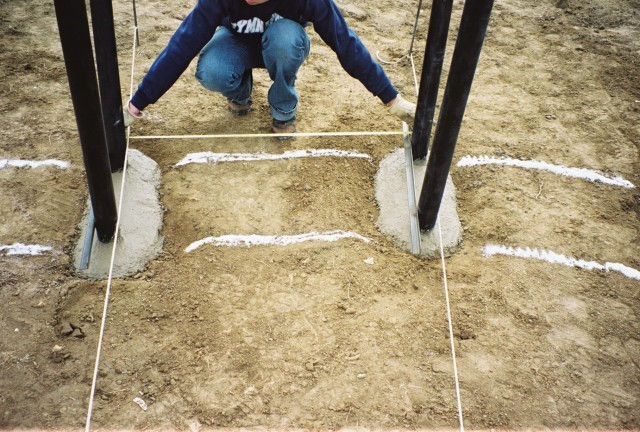
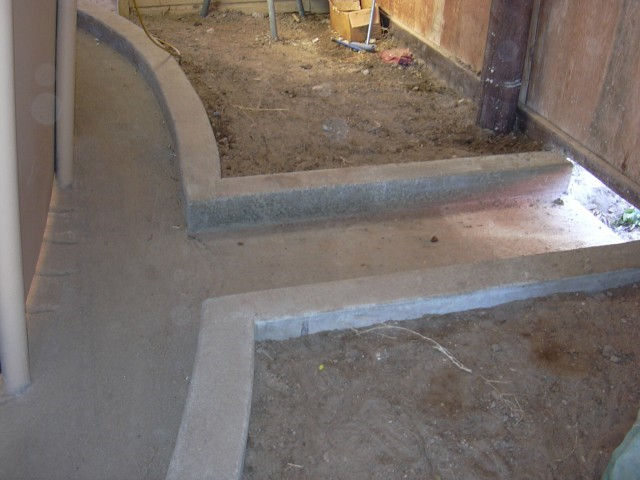
18. Build the forms for all the concrete flatwork in 4-foot (1.2m) straight sections that are 6-inches (15cm) to the outside of the posts to create a curb.

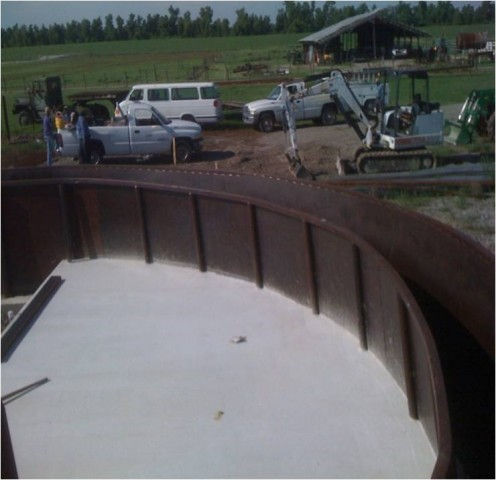
19.After setting the posts and building the forms for the crowd pen, single-file chute, and the wide curved lane, pour the concrete floors. A 6-inch (15cm) deep concrete slab is recommended. Use 3500 psi concrete for a top quality floor slab.

20. Reinforce concrete flatwork (floor slabs) with 6-6-10-10 welded wire mesh throughout.

21. To achieve proper grooving, it is important not to pour too much concrete at once or the concrete will become too hard to groove. Four to six yards (about a third to half of a large mixer truck) is recommended.

22. A raised concrete walking platform is most efficient. Both catwalks and raised concrete platforms are placed 42-inches (107cm) down from the top of the 5-foot (1.5m) high solid fence. Catwalks and raised platforms less than 2-feet (0.6m) off the ground do not need hand rails per OSHA regulations.
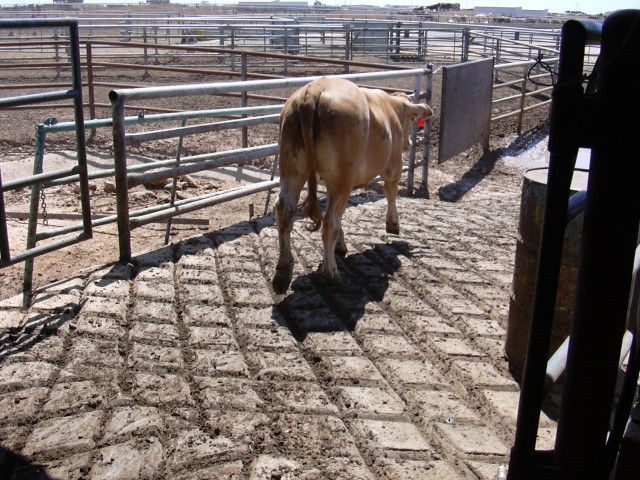
23. In all facilities, handlers must perform movement patterns alongside the single-file chute to move the animals. These handling patterns are more difficult to make on a catwalk than on a raised concrete platform.
24. It is important to groove the concrete at the area where cattle exit the squeeze chute to prevent slipping and falling.

25. Use a modified bull float for grooving the concrete to provide nonslip footing for cattle and bison. Pour a test pad and learn to use this tool before pouring the floor.

26. The modified float is made by attaching 1-1/2-inch (3.8cm) wide angle iron sections cut to the width of the float. Heat the ends of the angle iron and pinch them together to form what resembles a canoe. Weld two ¼-inch by 1-inch (0.63cm by 2.54cm) bolts to the center of the angle iron canoe. The angle-iron pieces are spaced on the bull float 8-inches (20cm) apart and mounted using washers and nuts.

27. Concrete has to be worked at just the right consistency to ensure proper grooves. If the concrete is too dry, the float will not rest on the concrete surface and the grooves will be too shallow. If the concrete is at the right consistency (not too wet, not too dry), one pass with the float is all that is needed.

28. A hand held grooving tool for finishing the edges and corners of concrete floors is made from a piece of angle iron with pinched ends.
29. Washout gutter for easy wash down of the single-file chute; note that the manure is contained in a small area. A 2-inch (5cm) gap is left under the 10-gauge steel sheet. Do not make a larger gap or serious foot injury may result.

30. Build the forms for the washout gutter by extending the floor slab forms 24-inches (60cm) past the fence in 4-foot (1.2m) straight sections, or curved sections of flexible form material.

31. Before pouring the concrete floor of the washout gutter, drive ½-inch (1.3cm) diameter reinforcing rods in the ground 3-inches (7.6cm) inside the forms and 24-inches (60cm) apart. The rods should extend 5-inches (12.7cm) above the top of the washout gutter floor slab. These rods will serve as the reinforcement for the washout gutter, located outside the fence on the outer perimeter of the washout gutter. Broom finish the washout gutter and all areas where people walk.

32. For easy washout of manure from the single-file chute, slope the concrete in the washout gutter floor ¼-inch (0.6cm) per foot away from the outside radius of the fence.

33. For easy washout of manure from the single-file chute, make single grooves 1 ½-inch (3.8cm) wide and 1 ½-inches (3.8cm) deep grooves 8-inches (20cm) apart. Angle the grooves like spokes on a bicycle to direct water towards the washout gutter. Note; the washout drain can be located anywhere along the outside radius of the single-file chute.

34. On the opposite side of the fence from the washout gutter and drain, build the forms 6-inches (15cm) to the outside of the posts to create a curb.

35. Proper grooving of the concrete is essential to prevent cattle from falling. A rough broom finish wears out too quickly and is not recommended for any species (other than humans). One area where deep grooved concrete is especially important is the exit area from the squeeze chute (as shown in this picture). Many cattle have a tendency to jump then run when released from the squeeze chute (crush).

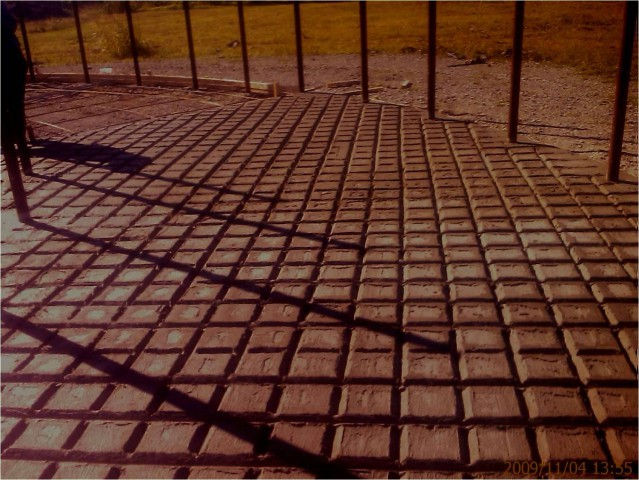
36. Deep groove concrete in all areas where cattle walk. Use 8-inch (20cm) diamond pattern grooves that are 1 ½-inches (3.8cm) deep and 1-1/2-inches (3.8cm) wide. The diamond pattern should be in the direction cattle travel.
37. Concrete has to be worked at just the right consistency to ensure proper grooves, If the concrete is too dry, the float will not rest on the concrete surface and the grooves will be too shallow. If the concrete is at the right consistency (not too wet and not to dry), one pass with the float is all that is needed.

38. A 2-inch (5cm) gap at the bottom of the fence for washout.

39. Deeply grooved concrete should be used only in crowd pens, single-file chutes, curved lanes, loading ramps, and in front of the squeeze chute. Deeply grooved concrete is not for areas where cattle live. In sorting pens, stock yards, and holding pens that have concrete floors, a shallow 1-inch (2.5cm) groove is recommended.
40. Some people have asked if this rough surface will cause foot bruises. It does not often cause a problem, but to prevent any bruising, lay down 1-inch (2.5cm) of sand on the grooves before using the facility. Let it stay for a few days of use. The sand and the feet of cattle will smooth over any rough edges. Calm handling methods will prevent foot bruising. Calm cattle are less likely to become agitated and hurt their feet by running across grooved concrete.

41. To build the catwalk, cut outrigger posts from 2 7/8-inch (7.3cm) OD fence posts that are 26-inches (66cm) long. Saddle cut one end of the outrigger pipe and cap the other end. Weld the outrigger pipe to the 2 7/8-inch (7.3cm) OD fence posts in the crowd pen, placing the top of the outrigger pipe 42-inches (107cm) down from the top of the fence.

42. Frame catwalk with angle iron notched at each post. Weld angle iron to outrigger posts closest to the fence. Use 3lb Grade X (expanded metal mesh) cut into 4-foot (1.2m) long and 2-foot (0.6m) wide sections. Lay expanded metal mesh flush with the angle iron and trim along the center line of the outrigger post. Frame the outside of metal mesh sections with angle iron and weld all sections. Do not use light weight material on walkways as they might break and result in injury to the handler.

43. Optional raised concrete walkway around the crowd pen. An 18-inch high curb was poured against the outside of the fence so the dirt used as an earthen berm was not against the solid steel of the fence.

44. Stock trailer and large truck loading ramp attached to the 12-foot (3.5m) crowd pen. A portable ramp is used when a seldom used semi-truck is used to haul cattle.
45. The end of the stock trailer is 66-inches wide and has two 36-inch (0.9m) long wing gates. The wing gates are chained to the sides of the trailer to prevent cattle from squeezing through the gap between the chute and the trailer.

46. A 12-foot (3.5m) selector gate opens across the crowd pen to direct cattle into the loading chutes. An 8-foot (2.4m) selector gate directs cattle to either the stock trailer chute, or as shown in this photo, the large truck loading chute.
47. The entrance from the crowd pen to the single file chute is 30-inches (76.2cm) wide. The slide gate is located at this junction.

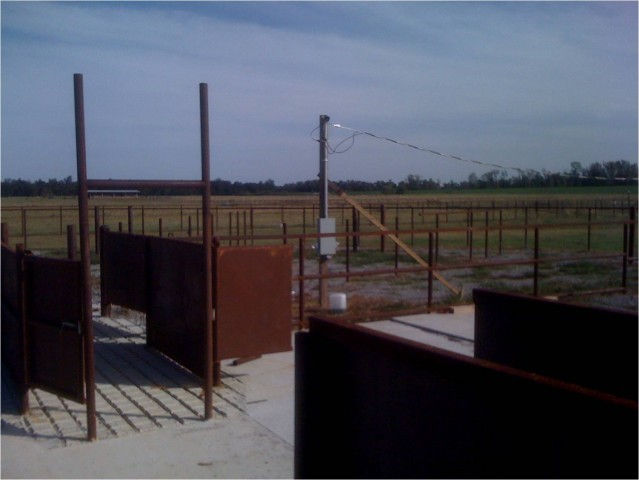
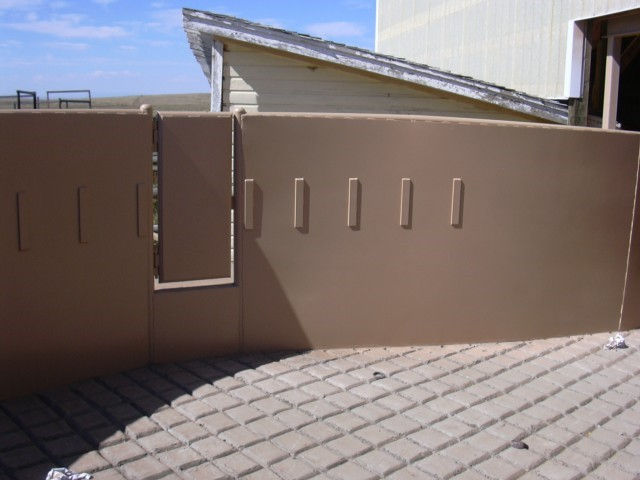
48. An 18-inch (45cm) opening in the solid fence of the crowd pen.

49. An 18-inch (45cm) man gate (handler gate) in the crowd pen. The gate has springs to keep it shut.
50. A handler pushes the crowd gate past the handler gate, the steps out onto the catwalk along the outside of the crowd pen. The ratchet latch on the crowd gate catches on the metal strips welded to the crowding pen wall. Ratchet cogs 12-inches (304cm) apart. Cogs: 3/8-inch (9.5) thick, 2-inches (50cm) wide, and 12-inches (304cm) apart. See details for ratchet latch on page 173 of the Humane Livestock Handling book.